HomeServe USA
 HomeServe Canada
 HomeServe Spain
 HomeServe France
Home heating advice
How to bleed a radiator
13 May 2020 • 5 minutes

Does your radiator have cold spots? It may need bleeding! Thankfully, bleeding radiators is a quick and easy process: you just need to know when, and how to bleed a radiator.
Let’s start by looking at the signs of a radiator that needs bleeding. You may need to bleed your radiator if:
If you notice any of these signs then there’s likely to be air trapped inside your radiator. This is preventing hot water from circulating and heating up.
Whilst some of these symptoms could indicate a number of problems, your first port of call should be to try bleeding the radiator.
A cold spot at the top of a radiator is the most common sign that your radiator needs bleeding. It essentially means air has collected in the radiator, preventing hot water from circulating and heating.
This air must be released in order for your radiator to heat up effectively. Patchy warmth in your radiator is definitely a sign it needs to be checked out – before it stops heating up altogether.
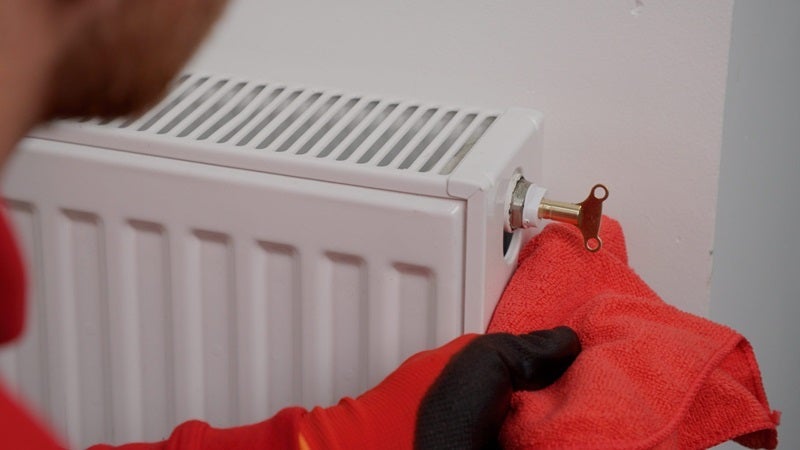
Now you know how to spot when your radiator might need bleeding, follow our simple step-by-step guide to check and bleed your radiators. Or watch our video, where our Home Expert, Chris shows you how it’s done.
Bleeding a radiator is simple, and doesn’t require a whole bunch of specialist tools. All you need to bleed your radiator are the following items:
Warning: The water inside radiators can be very hot, so take care not to scold yourself. Wear protective gloves and clothing, and be sure to also protect your floors!
Our Home Experts and plumbers get questions about radiators—and how to bleed them—all the time. So we put it to them:
“What questions are you most often asked about bleeding radiators? And how do you answer them?”
Like the pros they are, they delivered:
If no water or air comes out when you bleed the radiator, then the valve could be blocked with paint. Close the inlet and outlet valve at each end of the radiator, then remove the screw from the centre of the bleed valve. Insert the radiator key into the bleed valve and slowly turn it anti-clockwise (a quarter of a turn should be enough).
You should do a full check of the radiators in your home every couple of months. We recommend checking your radiators before the cold weather arrives, ensuring your heating system is running efficiently when you need it most.
You must not bleed a radiator when the heating is turned on as it may be too hot to touch and hot water could spray out of it, potentially causing burns to the skin. Ensure the heating is turned off before you begin bleeding a radiator. Additionally, letting out air when the pump is running will only draw more air into the system from elsewhere.
Depending on what type of radiators you have in your home, it may be possible to bleed them automatically using an auto vent. These handy devices are attached to your radiator valves and let out air gradually over time, helping to keep your radiators working efficiently. With an auto vent you won’t need to bleed them manually.
Once you’ve closed your radiator valves, it’s safe to turn your central heating and hot water back on. If you’ve been successful, your radiators should start to heat up within a few minutes, and the heat will be distributed evenly across the whole radiator. You can also check the pressure gauge on your boiler and check that it reads between 1 and 2 bars.
The average radiator should take no longer than 20-30 seconds to bleed. This can sometimes vary depending on the size of your radiator and the amount of air that is trapped inside.
Sometimes, you just can’t fix things by yourself. And nobody likes a cold radiator that refuses to heat up.
For help diagnosing and fixing the issue, contact HomeServe and we’ll put you in touch with a fully qualified, Gas Safe registered heating engineer.
Our help & advice articles cover Plumbing, Home heating, Electrical, Energy-saving and Home maintenance.