
How to fix a leaking radiator

person holding clough under a leaking radiatorHow to fix a leaking radiator

Has your radiator suddenly started leaking water? Don’t worry! We’re here to help you fix your leaking radiator fast with the best ways to nip the problem in the bud—before it starts causing damage to your home.


Table of contents

  1. Where to start with a leaking radiator
  2. Why is my radiator leaking?
  3. How to identify the cause of a radiator leak
  4. Leaking from radiator body: Pinhole leaks
  5. Leaking radiator valve
  6. Radiator spindle leak
  7. Radiator gland leak
  8. Radiator pipe joint leak
  9. Maintenance and care for your radiators
  10. Sometimes, fixing your radiator leak is a job for the professionals

Where to start with a leaking radiator

First thing’s first: check to see if your radiator is still working as it should.

If you notice that it’s not heating up properly, it’s worth taking a look at our handy guide to cold radiators to help diagnose the problem.

If you’ve done all these checks and there are no cold spots, then read on to find the right repair for your leak and your radiator.

Top tip: Repairs to radiators should only be made if you have a good level of plumbing confidence. If you are unsure about any of the repairs detailed below, please call a professional.

Why is my radiator leaking?

To help you figure out what’s causing the problem, here are some common reasons why your radiator is leaking…

  • Parts of the radiator are damaged
  • Loose radiator pipe joints
  • Corrosion caused by a build-up of debris during installation
  • Corrosion caused by air being drawn into the system

How to identify the cause of a radiator leak

You’ll need a few tools and household items to help you get to the bottom of the problem. Make sure you’ve got all these to hand, so you’re not running off to find them when you’re in the middle of the job:

  • An old towel – to soak up any water
  • Bucket – for water draining
  • Toilet tissue – used to identify the leak
  • Screwdriver
  • Spanner

Locating the leak

  1. Make sure your radiator is completely dry by giving it a rub down with your towel. This will make it easier to see where the leak is springing from
  2. Now take a small piece of toilet tissue and place it on the first of the following three areas:
  • The body of the radiator – keep checking the tissue for dampness as you move it around
  • The bleed point, valve, or tail
  • The pipe that brings water into your radiator

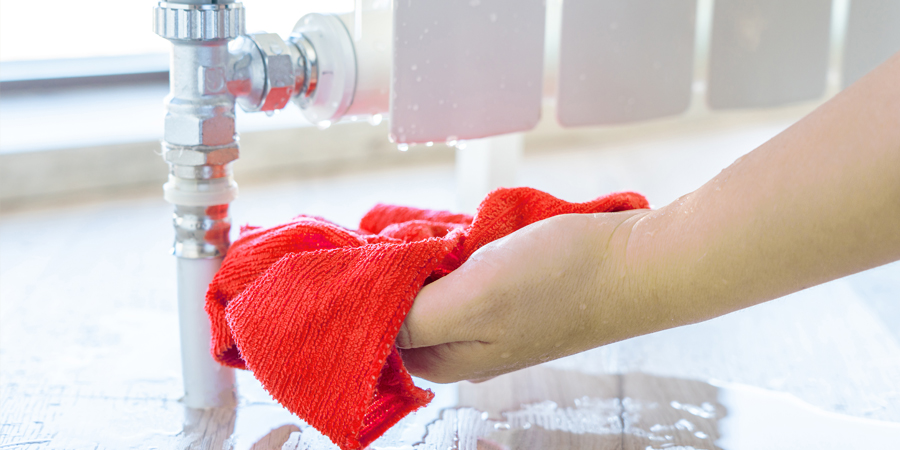
Top tip: Use a different piece of tissue for each area – it makes it easier for you to spot where the water is coming from.

Radiator valve or radiator gland?

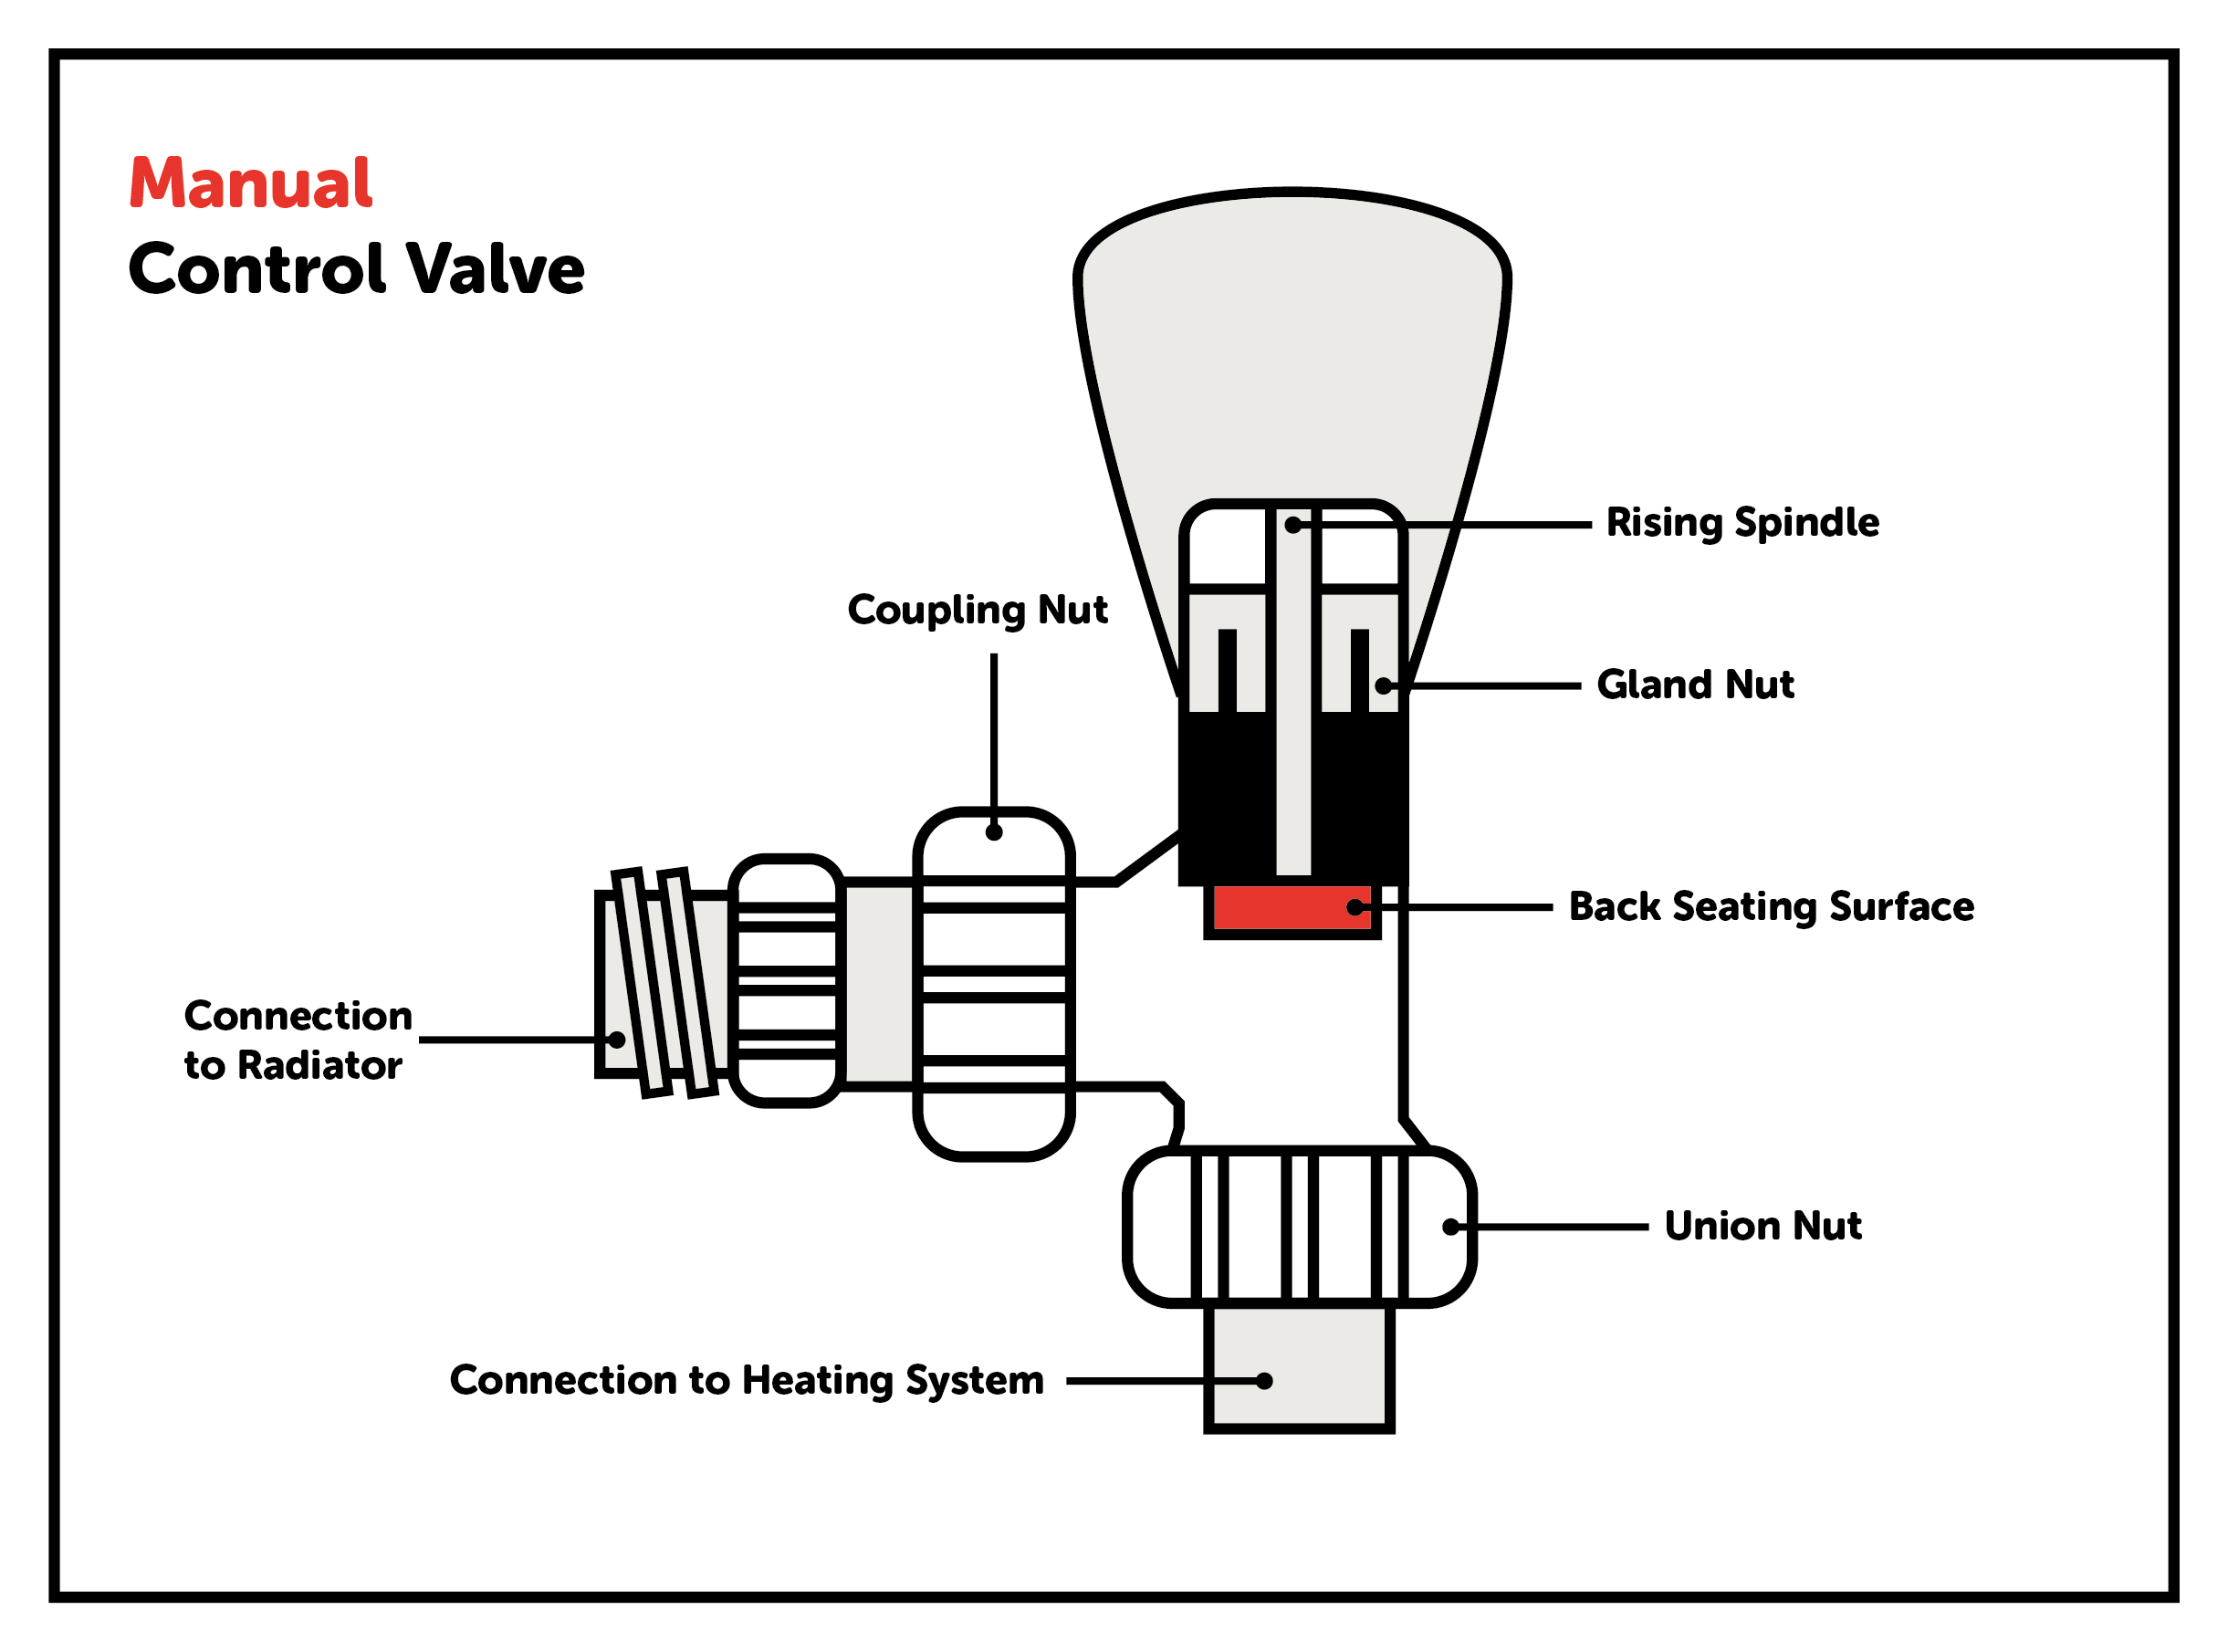
If the radiator valve coupling nut is the cause of the leak, this can often be sorted by tightening the coupling or replacing the olive inside the coupling. If the below steps don’t work, you may need to replace the radiator valve altogether.

  • Drain the heating system of water
  • Loosen the nut between the radiator and the leaking pipe
  • Remove the nut and fitting
  • Take the olive off and replace with the new

Remember to adjust the steps above accordingly if you have a grand union type valve.

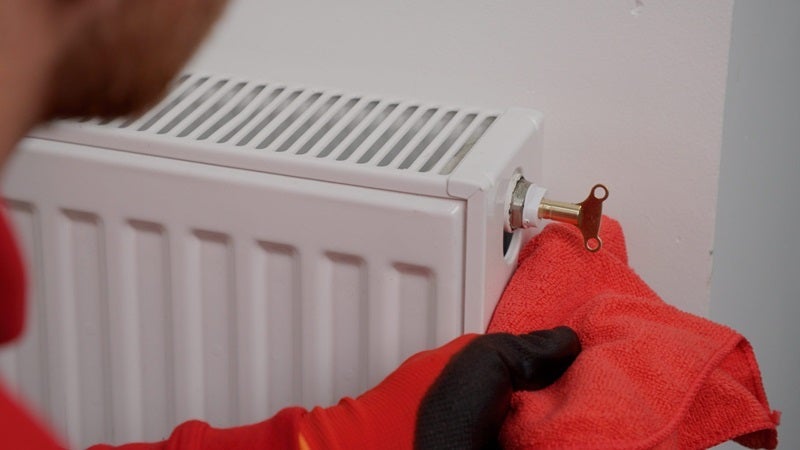
If it’s the radiator gland that’s leaking (under the plastic cap of the valve), you can fix it with PTFE tape.

  • Turn off the valve
  • Turn off the lockshield valve at the other end of the radiator if the water is still leaking
  • Remove the plastic cap and very gently unscrew the gland nut
  • Use a 20cm long length of stretched string PTFE tape and wrap it around the spindle valve
  • Push it into the body of the valve with a small flat-head screwdriver
  • Add a touch of silicone grease to the tape, and screw the gland nut back on
  • Pop the plastic cap back on

A graphic of a radiator's manual control valve with labelled parts, to help when fixing a radiator. The graphic indicates where the rising spindle, gland nut, coupling nut, back seating surface, connection to radiator, union nut and connection to heating system are located.

Leaking from radiator body: Pinhole leaks

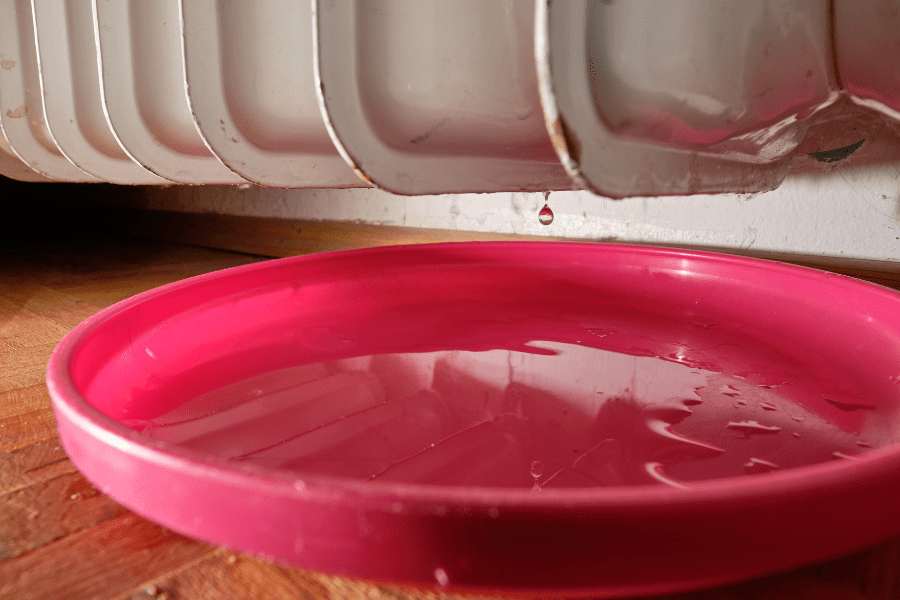
If the leak is coming from the body of the radiator, this is what’s called a pinhole leak. This can be caused by a number of things, such as corrosion or a build-up of sludge inside your radiator.

As the name suggests, pinhole leaks tend to be very small, but it could lead to you needing a new radiator. If you do ever need to replace the whole radiator, here are some tips and checks on how to do it:

  1. Turn off the boiler and allow enough time for it to cool down before attempting to handle the radiator
  2. Relieve the pressure by turning off the valves at each end of the radiator
  3. Remove the old radiator, closely following the instructions in your manufacturer’s manual (We also have a step-by-step guide on how to remove a radiator here)
  4. Flush out the system using a non-acidic cleaner
  5. Replace with a new radiator

Depending on how bad your radiator leak is, you may need to replace your radiator. If you’re not sure or need help, contact HomeServe today and we’ll book you an appointment with one of our friendly, local plumbers at a time that suits you.

Top tip: If you’re replacing a radiator due to a previous pinhole leak and issue with sludge and corrosion, try flushing your system and then adding a corrosion inhibitor to the water in your heating system. This helps prevent future issues. Naturally, we’d recommend you’re protected with HomeServe insurance too—just in case it happens again!

Leaking radiator valve

A typical cause for a leaking radiator valve is when there’s damage to the internal spindle packing. Thankfully, when it comes to fixing it, it’s easier than you might think. This type of leak often happens when the valve is partly open, so give it a tighten and once it’s closed the leak should stop.

A person uses a metal spanner to tighten a radiator valve on a leaking radiator.

How to fix a leaking radiator valve

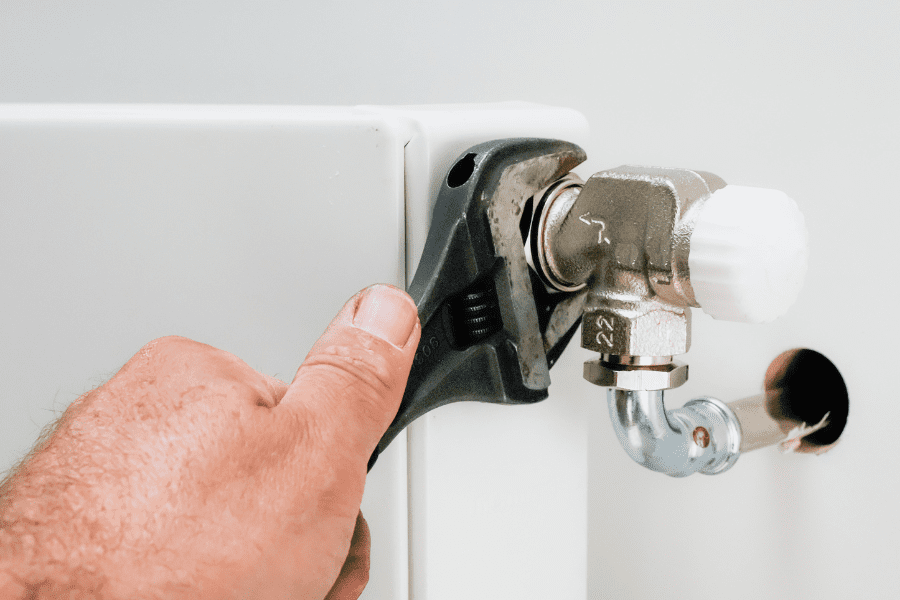
Here’s how to fix a leaking radiator valve in 10 simple steps:

  1. Drain the system below the leak,
  2. Turn off both the supply valve and lockshield valve,
  3. Catch any water that escapes in a bucket or old towel,
  4. Undo the union nut, using an adjustable spanner,
  5. Open the bleed valve to release any remaining water,
  6. Wrap the valve tail in PTFE tape,
  7. Re-tighten the union nut,
  8. Open both the bleed and lockshield valves,
  9. Wait for the radiator system to fill up with water again,
  10. Check for any leaks and then close the bleed valve.

If this doesn’t get rid of the leak, you might need to replace the valve. The key thing is to make sure that the replacement is the same as your existing valve. Not sure where to start? Don’t worry, we’ve got it all covered in our how-to guide on changing radiator valves.

Radiator spindle leak

If you discover that the leak is coming from the spindle and not the valve, you could still be able to fix the problem yourself.

How to fix a radiator spindle leak

To fix a leaking radiator spindle, follow the steps below:

  1. Use a spanner to tighten the gland nut,
  2. If this doesn’t stop the leak, undo the gland nut,
  3. Wrap PTFE tape down into the spindle,
  4. Tighten the gland nut back up again.

Radiator gland leak

So, your radiator’s got a brand new valve and it’s still leaking. Next stop is to check the gland. This is a small fixture that sits underneath the plastic lid of the valve.

Fixing a radiator gland leak

To fix a leaking radiator gland, follow the step below:

  1. Turn on the radiator valve to see if water leaks from underneath the plastic cap
  2. If it does, turn off the lockshield valve
  3. Remove the plastic cap and unscrew the gland nut
  4. Wrap PTFE tape around the valve spindle and push some of it down into the body of the valve
  5. Screw the gland nut back and position the plastic cap on top again
  6. Turn the valve back on

Radiator pipe joint leak

Over time, the pipes that connect your radiator to your central heating system can become loose, causing an unexpected leak.

If you should notice water dripping from the pipe joint, grab a spanner and tighten everything up. If this doesn’t do the job, follow these steps:

  1. Drain your radiator
  2. Remove the nut from the leaking radiator pipe using a spanner
  3. Wrap PTFE tape around where the face of the olive meets the joint
  4. Use your spanner to tighten back up

Maintenance and care for your radiators

Radiators are generally robust, hard-working soldiers in your home and, with a little care, they’ll keep you feeling toasty for several years.

However, there are a few easy steps you can take to get the best possible mileage out of your radiators and avoid leaks in the future — especially if you’ve just replaced one or two of them.

Don’t place your furniture too close to your radiators

Not only can this potentially damage your furnishings but it can also stop heat from circulating properly, bringing down your energy efficiency and increasing your costs.

Check the levels of inhibitor in the system on a regular basis

The inhibitor is the chemical liquid that protects and prolongs the lifespan of your central heating system.

Don’t dry clothes on your radiators!

We all do it sometimes, but it causes condensation and rust.

Check your radiators once a month for cold spots

Does your radiator have cold spots? Then you need to bleed your radiator.

Don’t put wet towels on radiators

Avoid placing your wet towel on a radiator after your morning shower, unless it’s a special towel warming radiator!

Sometimes, fixing your radiator leak is a job for the professionals

We hope this has given you everything you need to fix your leaking radiator yourself. And great work—it’s not always easy!

However, if you’ve not managed to find the cause of the leak, don’t worry. Simply book a Home Expert online or give us a call today on 0330 0247 064.

We’ll be ‘round to get things running smoothly again, at a time that suits you.


Share this post

About the author

Brian became a fully qualified gas engineer in 2009 and has been with HomeServe since 2012 after a couple of years being self employed.

Brian was a Gas Engineer for six years at HomeServe before progressing to a Service Excellence Coach (SEC) role in 2018. The main purpose of the SEC role was the coaching and training of existing engineers as well as attending problem or complaint jobs.

Brian became a Self Fix Engineer in 2021, where he developed the Self Fix Tool guide that the call centre agents use to help our customers carry out simple user adjustments to get their boiler back up and running.

ACS, NVQ Level 3 Plumbing & Heating, IOSH, Unvented, Level 3 Team Leadership / Business Admin

Years qualified

Since 2009
Read more

Still looking for more help & advice?

Our help & advice articles cover Plumbing, Home heating, Electrical, Energy-saving and Home maintenance.

View all articles