
Top 5 kitchen plumbing problems

woman with son in the bathroom -Top 5 plumbing issues and how to fix them

Table of contents

  1. Do I have a plumbing issue?
  2. Why it’s important to know the top 5 plumbing issues
  3. No.1: Dripping taps
  4. No.2: Slow draining or blocked sink/shower
  5. No. 3: Clogged toilet
  6. No.4: Running toilet
  7. No.5 – Toilet that won’t flush

Do I have a plumbing issue?

Plumbing is crucial to keeping our homes running safely and smoothly, so discovering there’s an issue can be stressful. Here we take a look at the top 5 plumbing problems that can happen, that aren’t leaks. If you’ve got a leak, then make sure you check out our guide to common water leaks in the home and how to fix them.

Why it’s important to know the top 5 plumbing issues

It’s important to stay on top of any plumbing problems that could occur in your home. This is because what starts out as a relatively minor and inexpensive repair could very quickly escalate into something that’s much more serious and potentially quite costly to fix.

Even the smallest of leaks, which seem pretty harmless, could be doing more damage than meets the eye. That’s why we’re here to help give you the information that will help you prevent rather than cure when it comes to taking care of your pipes, taps and drains.

Below are the top 5 most common household plumbing issues, their typical causes so you can troubleshoot them and some top tips on how they can be fixed. Some problems are relatively straightforward and easier for a keen DIYer to deal with, as long as you’ve got the basic tools, while for others you may need to call in an expert plumber to help.

No.1: Dripping taps

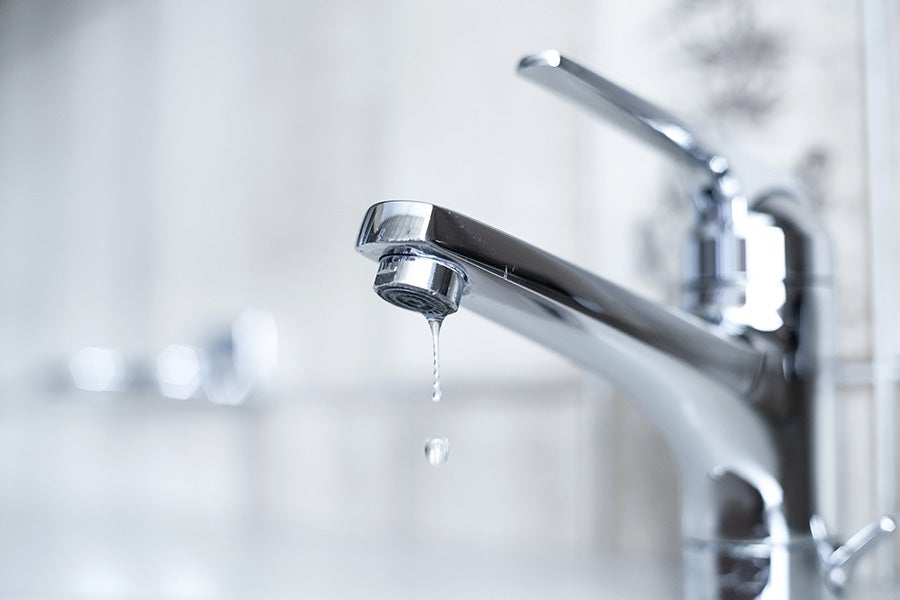
If you’ve ever been trying to sleep and all you can hear is the relentless ‘plink, plink’ of a dripping tap in your bathroom or kitchen, you’ll know it’s enough to drive anyone mad.

But did you know that one drip per second is equal to 2,600 gallons per year? As your sanity slowly ‘plinks’ away, so does your bank balance. So let’s find out what’s causing it and how to fix it.

What causes a dripping tap?

The cause of a dripping tap in most cases is normal wear and tear; but it all depends on what type of tap you have, as to what’s causing the problem. Whilst older taps typically have an internal washer that has become stiff, torn, worn, or dislodged over time, monobloc mixers, quarter-turn or bi-flow taps don’t. In this case, the problem could be down to a build-up of debris or simply not turning the tap tight enough.

How to fix a dripping tap

If you’re a DIYer, it’s relatively easy to inspect the tap to find out which of the above common causes it is and to then fix it, but you need the correct tools – a spanner, screwdriver and replacement parts to hand.

6 steps to fix a dripping tap

Here’s a step-by-step guide to fixing your leaking tap. You can also watch our ‘how to fix a leaking tap‘ video for a visual demonstration.

  1. Switch off the water supply through your isolator valve or stop tap.
  2. It’s time to open up the tap:
    a) unscrew the cap
    b) take off the tap head
    c) unscrew the body of the tap
    d) run your finger inside to check the seating (if it’s cracked you’ll need to replace it. If it’s flush, it’s fine)
  3. Remove the washer and clean away any debris (this may be the cause of the drip).
  4. Inspect the washer – if it looks stiff, worn, torn or damaged, it’s time for a new one.
  5. Put your tap back together.
  6. Switch your water supply back on and check the drop has stopped.

No.2: Slow draining or blocked sink/shower

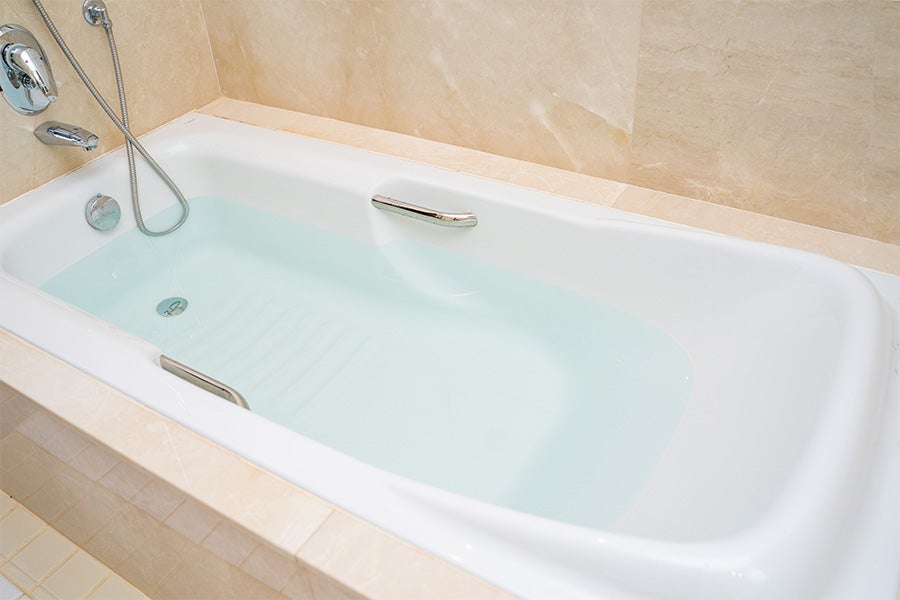
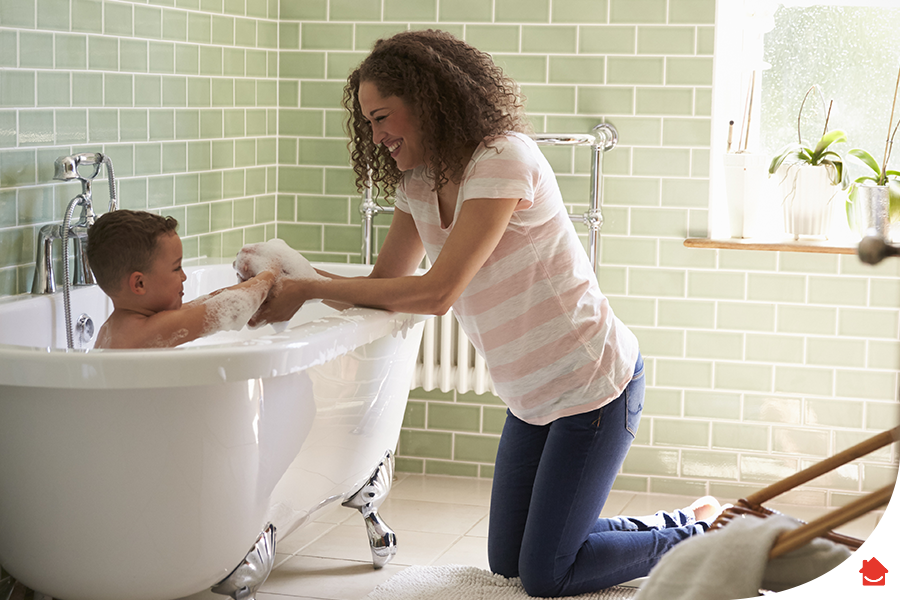
A slow-draining sink is normally caused by a blockage that’s restricting water flow down the drain. If your slow-draining sink is in the kitchen, it may contain things like congealed fat and bits of food. In a bathroom sink, bath or shower drain, the blockage is more likely to be caused by knotted hair and soap. You can read more on how to unblock a bath or shower with our guide.

Clearing a blockage can be done in a variety of ways. The problem generally gets worse over time if it’s not dealt with, so it’s best to nip it in the bud as soon as you suspect there may be a blockage.

You can unblock a drain using (in order of increasing difficulty and danger):

  • Natural household items
  • A plunger
  • Plumber’s snake

How to unblock a sink, bath or shower drain using a plunger

It’s time to take the plunge! A bit of vigorous plunging can really help create that suction needed to dislodge clogs. So here are the steps:

  1. Add petroleum jelly to the edge of the suction pad to improve the seal.
  2. Make sure there is enough water in the sink or shower so that the end of the plunger is submerged.
  3. Plunge vigorously.

WARNING: be careful with a plunger
Care needs to be taken when attempting to plunge a bath as most have combined overflows which are often concealed under the bath. These can sometimes pop off, potentially flooding the bathroom.

How to inspect the U-bend of a sink

The next thing to check is the U-bend (this is also known as the trap) of a clogged or blocked sink. There could be a big blockage here, so here are the steps:

6 steps to clearing the U-bend of a blockage

  1. Put the plug in the plughole (or switch off the water supply) to make sure no water comes down your open pipe while you’re inspecting it
  2. Remove the U-bend pipe. You may be able to untwist the fixings with your hands or use a pipe wrench
  3. Inspect the pipe for any issues that may be causing the drain not to clear
  4. Now clean the pipe fully to ensure when you reinstall the pipe it doesn’t occur again anytime soon. There will likely be some debris and grease that comes out of the pipe
  5. Put the pipe back together and tighten
  6. Unplug the sink/ switch your water back on and test the drain

What to do if your sink or drain is still blocked

If you’ve tried the natural household unblocking remedies, the plunger and the U-bend and no joy, your blockage is even further down the pipe than expected.

How to unblock your drain with a plumber’s snake

A plumber’s snake is made for stubborn blockages like this. Snakes are more effective than plungers – they’re about £20 from DIY shops. However, they’re much more challenging to use and come with a warning: using a snake incorrectly can damage your pipes further down and lead to major leaks.
You can avoid such problems by learning how to snake your drain the right way (or calling in an expert plumber).

What you need to know about snaking a drain

A plumber’s snake is a flexible, long metallic cable for cleaning blocked PVC pipes attached to basins, sinks and baths. At the end is an uncoiled spring or small auger, which is the bit you insert into your drain. The other end of the cable has a handle.

The snake works by getting right down into your pipe and getting into contact with the clog, cranking the handle so you catch the clog and clear it.

3 steps to snaking a drain

  1. Insert the snake manually down the sink and into the drainpipe
  2. Rotate the handle slowly and carefully to uncoil the snake
  3. As it uncoils, the snake will move deeper into the drain until the auger moves through the clog and breaks it up.

No. 3: Clogged toilet

When your toilet bowl fills up and doesn’t drain away, you’ve got a very obvious blockage. This blockage is normally caused by a mixture of paper and human waste and it’s one of the more unpleasant fixes you’ll no doubt have to do at some point.

You can read our full guide on how to unblock a toilet here. We’ll summarise it below:

How to unclog a toilet with a plunger in 6 simple steps

First things first – if you can see what’s causing the blockage, the easiest thing to do is put some rubber gloves on and reach in to remove it.

  1. If you can’t see what’s causing the problem, it’s time to gather some equipment:
    – A plunger – make sure it’s a toilet plunger and not a sink plunger (they’re different shapes, so it’s important you use the right one)
    – Rubber gloves
    – Old towels or newspaper
    – Bucket
    – Coat hanger
  2. Protect the surrounding area with old towels and/or newspaper
  3. Make sure the toilet won’t overflow. Before you start unclogging, it’s important to make sure the toilet won’t overflow. There should be a shutoff valve in the pipe coming out of the wall behind the toilet. Gently turn the shutoff valve clockwise. If you have an older toilet you’ll need to deal with the float in the toilet tank instead of a valve. Use a coat hanger or piece of wood to keep the float upright, so the tank can’t keep refilling when flushed. Tip: Soften the toilet plunger by soaking it in hot water for 5 minutes before use.
  4. Make sure your toilet plunger is completely submerged in water as you plunge (you may need to add some using the bath or sink and your bucket)
  5. Create a vacuum with the plunger. Place the plunger under the water, completely covering the pipe. Slowly and firmly push down to create a seal, then pull up to create a vacuum to dislodge the blockage. Repeat this activity, increasing the speed with which you work and expect to continue for at least 15 minutes.
  6. Clean your toilet plunger when you’ve finished (flush it a few times in the toilet with some household bleach and washing-up liquid).

If you don’t have a plunger, take a look at the DIY hacks in our article on how to unblock a toilet.

No.4: Running toilet

If your toilet is constantly running, there’s more than water being flushed away – 200 gallons of water a day down the drain means your hard-earned cash will be too.

What causes a running toilet?

There are a couple of common causes for a running toilet. You may have a syphon valve or a ball valve issue. Here’s how to troubleshoot your syphon valve (you may need a replacement):

How to find out if a faulty syphon valve is causing your running toilet

syphon-valve-toilet-diagram - Top 5 plumbing problems

  1. Push down on the syphon with a stick when you hear the water running and listen for it to stop when you push down
  2. If it stops, you know the syphon isn’t sealing properly
  3. Buy a new syphon valve of the same type from your local DIY shop
  4. Check the fill tube length and cut it back so it’s at least a ½ inch above the waterline
  5. Now shut off the main supply valve under the toilet (or the main supply)
  6. Flush the toilet to drain out the water, then unhook the old syphon
  7. Install your new syphon (follow the instructions on the pack)
  8. Hook the syphon chain onto the flush lever arm so there’s a little slack when the syphon is closed.

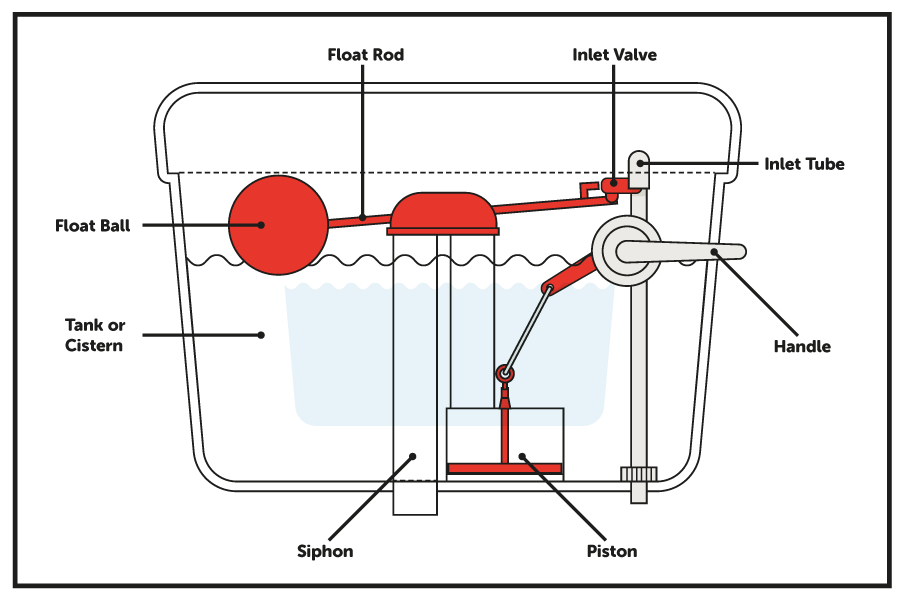
The toilet will continually run if the syphonic action isn’t being interrupted or induced, this could be one of two problems:

  1. The water level in the toilet cistern isn’t dropping below the ‘bell’ of the syphon and therefore the syphonic action is not being interrupted, this could be caused by water entering the cistern too quickly through the inlet valve. Ensure that any silencer tube is correctly positioned on the outlet of the inlet valve to allow the correct volume of water into the cistern when it refills.
  2. The inlet valve isn’t turning off and the water level in the cistern is filling over the bend in the syphon, the blue bit in the picture above, if this happens the syphonic action is induced by water running down into the bowl, this would be a series of continual flushers.

Another reason why the toilet continually runs could be due to the inlet valve not shutting off correctly, if your toilet has an internal overflow then you may get a small trickle of water entering the bowl after flushing, if this is the case then it is likely to be a problem with the inlet valve.

How to troubleshoot a toilet inlet valve issue

  1. Shut off the water supply line
  2. Take off the toilet lid
  3. Flush the toilet and look inside the toilet tank. Is the water level rising so high that it’s draining into the overflow pipe? If the answer is yes, then you need to clean the fill valve (you need to buy a special cleaning solution/toilet kit from a DIY shop)
  4. If the cleaning solution doesn’t resolve the issue, replace the fill valve

No.5 – Toilet that won’t flush

If your toilet isn’t playing ball and you’re struggling to flush it, it could be down to a number of different things. There might be a blockage, a problem with the flushing mechanisms, a water supply issue or simply just a broken handle. We’ve put together a handy guide to get to the bottom of what’s causing the problem and the easiest ways to get it flushing again.

If you find that your toilet still isn’t flushing, contact HomeServe – they’ll be happy to help.

Don’t let a burst pipe or blocked drain slow you down. Take out plumbing and drainage cover and get access to a nationwide network of Home Experts and claim 24/7.


Share this post

Share this post

Still looking for more help & advice?

Our help & advice articles cover Plumbing, Home heating, Electrical, Energy-saving and Home maintenance.

View all articles